DIY: Tomato Cage Trellises
When we bought our house, we inherited several tomato cages. They were tangled in the wild strawberry vines behind a shed. I gave most of them to a friend who's a domestic goddESS and gardens even! She's using them for actual tomatoes. Which I help her eat when she has too many.
I on the other hand, had a bad experience with garden growing when I decided to plant one in sixth grade. Our yard was clay and my watermelons were the size of baseballs. And tasteless. After watering faithfully day after hot day, I was not impressed. Which is why my remaining tomato cages would have a destiny all their own. Also, because I couldn't afford these from Pottery Barn.
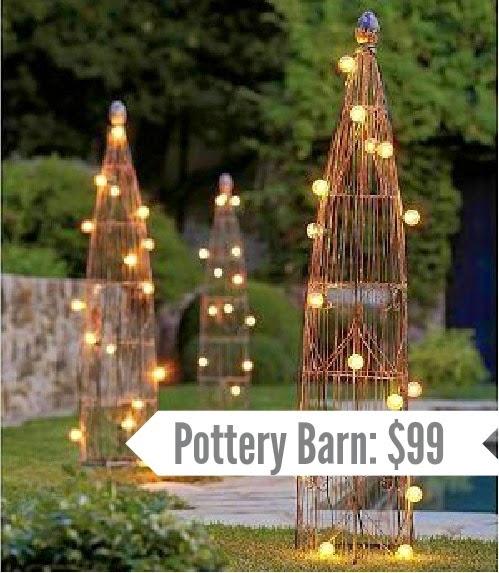
My plan for this type of trellis was always to grow a leafy/flowery vine up it and (if we ever get electricity in our garage) add some twinkly white lights to them. This year, I invested in clematis plants and planted them in a strip of earth that lines our driveway. Before this summer, there'd been only the free creeping flocks and a brick edge. I separated some of the flocks out to speed up their creeping and put the clematis between. The strip narrows so there's not enough room for more than two, but that was alright since they were $20 each. But they'll come back every year and be an ongoing joy.
I turned a tomato cage upside down and placed it at the base of a clematis. I twisted the ends that normally poke into the ground into a group that looked like the top of a tepee. Then I twist-tied the plant to the cage in different places, encouraging it to grow around to the opposite side of the cage. Here's how they've begun to cover around the cage.


I on the other hand, had a bad experience with garden growing when I decided to plant one in sixth grade. Our yard was clay and my watermelons were the size of baseballs. And tasteless. After watering faithfully day after hot day, I was not impressed. Which is why my remaining tomato cages would have a destiny all their own. Also, because I couldn't afford these from Pottery Barn.
My plan for this type of trellis was always to grow a leafy/flowery vine up it and (if we ever get electricity in our garage) add some twinkly white lights to them. This year, I invested in clematis plants and planted them in a strip of earth that lines our driveway. Before this summer, there'd been only the free creeping flocks and a brick edge. I separated some of the flocks out to speed up their creeping and put the clematis between. The strip narrows so there's not enough room for more than two, but that was alright since they were $20 each. But they'll come back every year and be an ongoing joy.
I turned a tomato cage upside down and placed it at the base of a clematis. I twisted the ends that normally poke into the ground into a group that looked like the top of a tepee. Then I twist-tied the plant to the cage in different places, encouraging it to grow around to the opposite side of the cage. Here's how they've begun to cover around the cage.
As you can see, they aren't as tall as the trellises I'd drooled over at Pottery Barn, so I gave them some height. If you use larger tomato cages, this won't be necessary. I took a couple wire hangers and "extended" them. First I untwisted the necks of the wire hanger and made them a straightish line. I used the non-cutting part of my wire cutters to manipulate them, which is way more pleasant that trying to do it with your hands. I bent them in half and attached the ends to the "tepee tips" of the tomato cage in two places.
The rusty part is the top of the tomato cage and the greenish part is the wire hanger. The folded end sticks up into the air, forming the top of my trellis. If you have any young children's toys to open (for safety reasons they are secured approximately a thousand times), some good can come of it! Use the plastic-covered twist ties to train plants without cutting into them. Here's how the clematis looks with the hanger hoisting it up.
The height makes it much more elegant. Now for an overall view of the flower bed...which has improved a bit from way back when...
So there's how you make your own cone-shaped trellises out of tomato cages and wire hangers. I realize they aren't a great option if you don't want a plant climbing your trellis, but that was always my plan so I don't care what the trellis looks like underneath. Here's a handy little photo that would be super great for pinning...hint, hint. :)
Have a wonderful week guys! I know I've only been posting once a week lately and I have so much to tell you, but I'm making the most of my last three weeks of summer. It may be slim pickin's a while longer. Since I don't know when I'll be back, I'm doing a version of What I Wore Wednesday on this Tuesday, because it's my blog, so I can. And because, I will be in yoga pants on the actual Wednesday. Guaranteed.
I've always loved tomato red with turquoise but black and white stripes brighten it up. Later, my loves!


Comments
Post a Comment