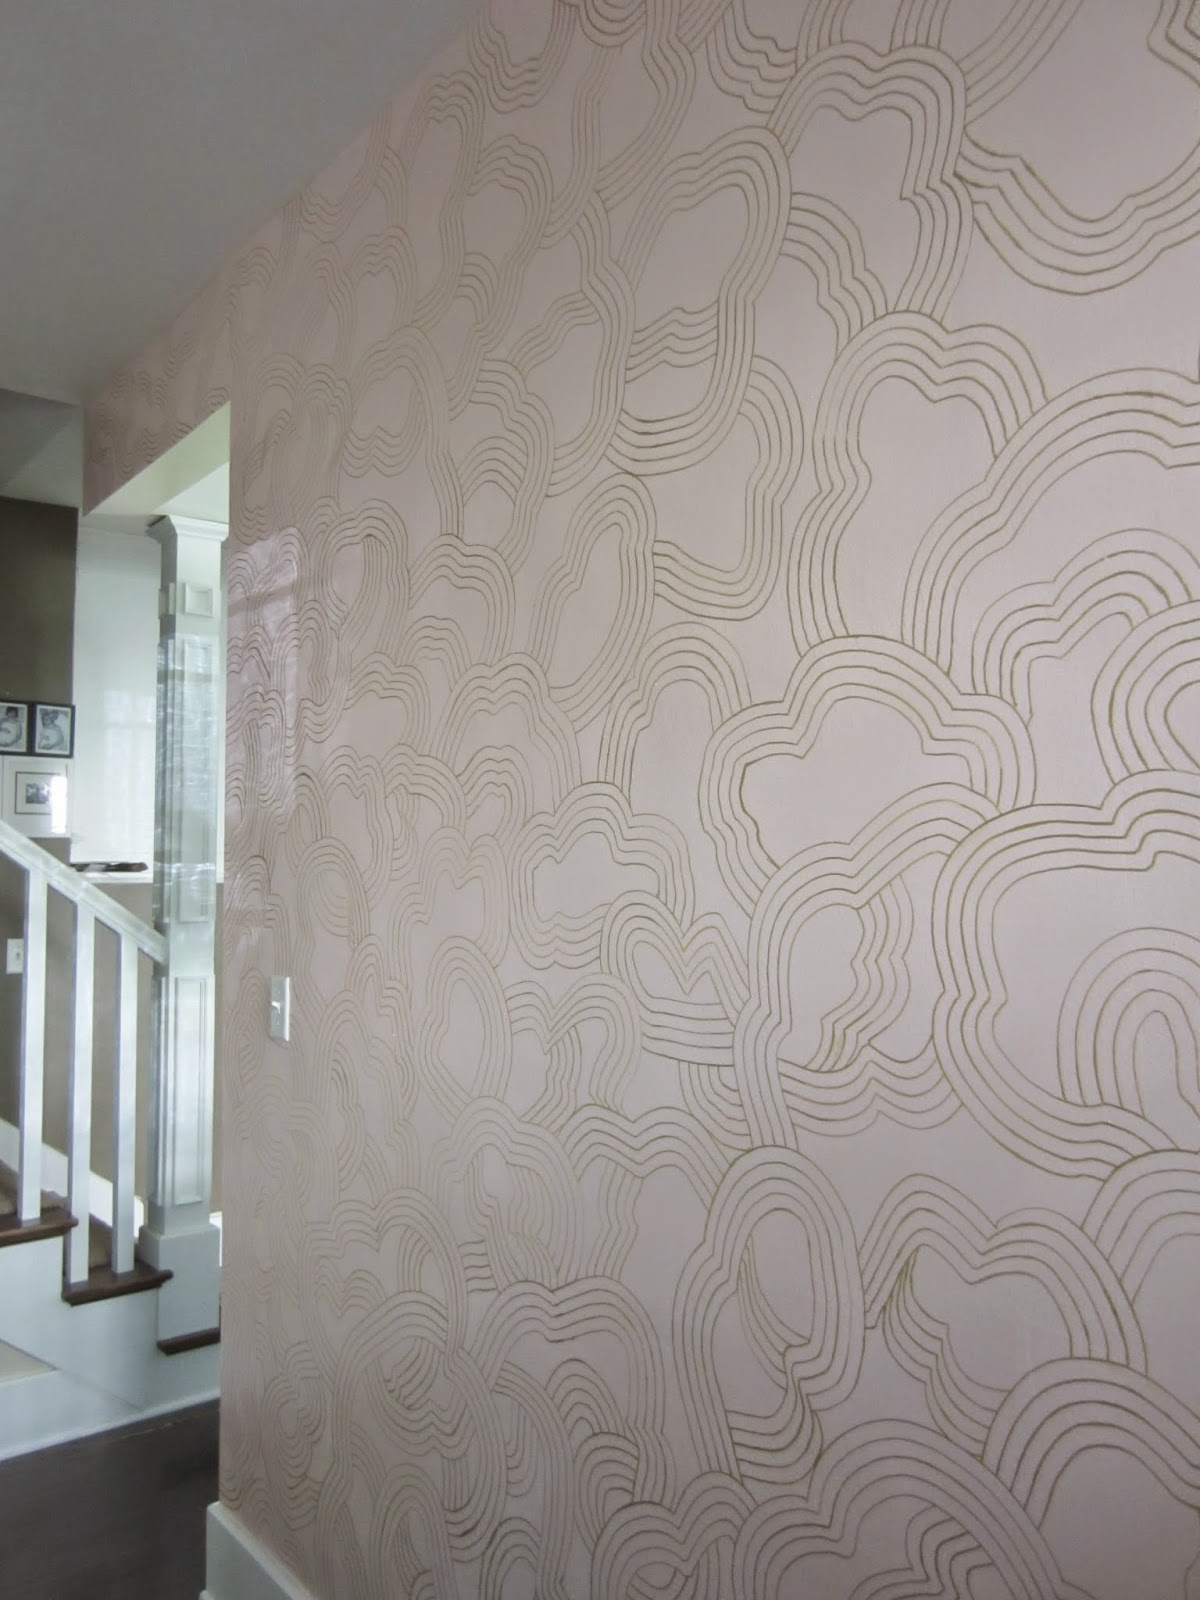
Sharpie DIY Wallpaper
I've already shown you my pink wall, but I failed to mention it was destined to be blush pink with gold pattern running all over it! I've been sitting on it a while because I wanted to get it right. I poured over wallpaper ideas and imagined how I could cover an entire wall before, say, retirement age.
My main concern was how imposting the wall is. It's 9 1/2 feet tall. I felt a vertical pattern would be overwhelming, so I was after something horizontal or organic. Something that wouldn't lead your eye anywhere, just sort of entertain it, if that makes any sense outside my brain...
I decided to use water-based Sharpie paint pens. If it looked awful, I could paint over it and begin again. The oil versions would not be so easy, so steer clear. I bought five of them at Michaels with coupons. Rather than making five trips, I took my family with me (after buying one initially) because you can do separate transactions for each person present, children included. That's how you use more than one coupon in a day! If you don't have kids, I'd suggest borrowing some. It even crossed my mind to go with a friend who has kids and "share" them (I'd check out with her kids and mine, then she'd do the same). I've not been this desperate yet, but I think it's a wonderful policy on the store's part. If your kids are planning their own crafts, they can each have a coupon to make it more affordable. Hobby Lobby has the same policy and I've had cashiers actually TELL me this to save me money. I was impressed.
With my five markers, a piece of their cardboard packaging (for stabilization) and hello kitty duct tape, I created this masterful tool:
My inspiration was malachite, the amazing green stone you see here, which reveals a gorgeous pattern when cut. So I took my handy-dandy tool and started making a cloud-like pattern.
This is where I started and you can see I wasn't sure how to make all the pens connect and release their ink. For those who come after me: pressure brings the paint to the tip, so if you aren't getting it to flow, push all the tips down together on scrap paper and then continue. It feels awkward when you begin, but by the end I was much more comfortable. I also figured out how I liked the pattern best and here's the last section I did, which is also my favorite.
I didn't like lines going through the middle of my "clouds" or "clovers" or whatever you think they look most like. Especially if they met up like the one below...ugh.
But the great thing about this pattern is the overall effect is pretty forgiving. Here are a few more of my mistakes so you can relax.
Got my lines a little off here and had to fill it in. Then there's the inconsistency of the paint as it comes out. I had lots of lighter sections from my not-pressing-the-tips-down era, which I went back with one marker to touch up. Below, you can see the fourth line from the right has a light section.
So it took me a couple days with the extra touch-up, but I'm really happy with the result. I love how the sheen makes it very subtle in person.
Now all we need is some art on that wall and something in this vase...
...and we'll be golden. Any ideas for what to put in that vase? I have some foam balls I thought about covering but I'm not sure what to use.


I am big on sea glass and seashells we find from beach trips. However, Christmas ornaments are another fun and cheap option you may want to use. I love watching your decorating process. Very cool seeing it all come together (and on the cheap!).
ReplyDeleteGreat wall, Kendra! My brain was on a similar wave as Asheley's. First thought was pinkish and off-white sea shells. Then, small Christmas balls occurred to me, maybe a mix of frosted golds and pinks. Of course, any of it might be topped off with 1 or 3 peacock feathers, to play off the turquoise bowl on the dining table.
ReplyDeleteBlissings,
Dena